Section 1
Distortion Effects
After Effects comes with an entire category of distortion effects, which are exactly what you need to squash or stretch a layer. In order to be effective, you need to pick an effect that offers as much control as you need, but not too much. The Mesh Warp effect, for example, allows you to make very detailed deformations, but I wouldn’t recommend it for squash and stretch as it requires you to manually animate every single point of the mesh. This is very tedious, and also makes consistent animation of the entire shape nearly impossible. A corner pin effect is going to the other extreme: you only need to animate the four corner points (which is much less work), but it doesn’t give you enough control to create any kind of curved deformations. So in practice, I’d recommend only three effects for animating Squash and Stretch: the Bezier Warp, the Puppet Tool and the Transform Effect.
Bezier Warp Effect
The Bezier Warp is very similar to a corner pin – you can move each of the four corners of your layer independently, and it will stretch the layer accordingly. But there are a couple of important differences:
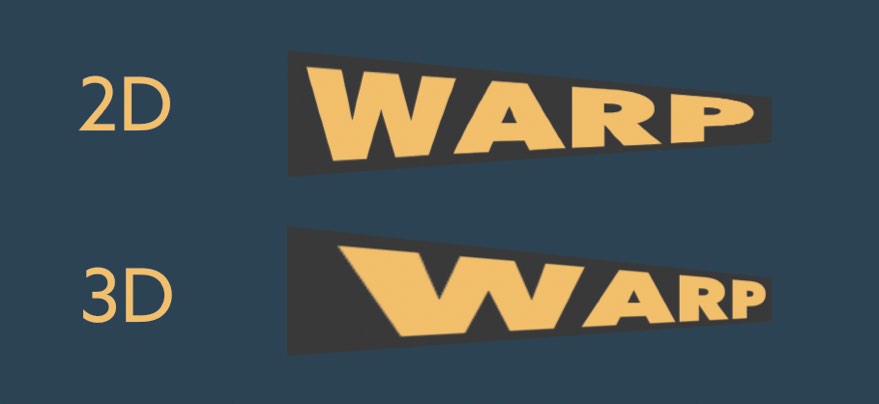
In contrast to the Puppet Pin tool, the Bezier Warp also handles extreme deformations easily.
In this example, the layer deforms almost entirely into a thin line. While the Bezier Warp has no problems compressing the layer in this way, with the Puppet Pin tool it’s nearly impossible to achieve this. Here I’ve tried to achieve this deformation, first with the Bezier Warp and then with the Puppet Tool.
Puppet Pin Tool
Despite its limitations, I find the Puppet Pin Tool useful for some kinds of Squashing and Stretching, in cases where the deformation doesn’t need to be too extreme. The big advantage compared to the Bezier Warp is that you can choose how many control points you need and where to put them. Often you can get away with less control points and so need less keyframes for your animation. To stretch a simple bouncing ball, for example, just one pin at the top and one at the bottom are already good enough. This means that instead of dealing with the four corner points and eight tangent positions of the Bezier Warp, you just need to keyframe two pin positions. For another example, let’s take a look at the overshooting ‘A’ from the Passive Squash & Stretch section. As you can see, the deformation just required three pins, and only one of them (at the top of the A) needed to be keyframed.
Scale and the Transform Effect
Using the scale property in the layer transforms might seem to be the simplest way to squash or stretch your layer. It’s not powerful enough to bring a complex animation to life, but it’s definitely enough to compress a bouncing ball, for example. However, there is one nasty detail: the anchor point. To compress your ball, the anchor point should be at the bottom where the ball touches the ground. It’s more likely that the anchor point is in the middle of the ball, but you should resist the temptation to simply move it to the bottom. First, this is tedious, since you have to shift the entire motion path, and second you’ll really regret it you also want your ball to rotate a bit.
A much better solution is to use the Transform effect, which offers controls that are very similar to the normal layer transforms. So, on top of the normal layer transforms you can easily add a second round of transformations with its own, independent anchor point. Use it as follows:
For more details, see this one minute tutorial.

Create animations with Squash & Stretch in no time with a collection of ready to use behaviors, carefully handcrafted by professionals and controlled by an intelligent system – ensuring your animations come to life without starting from scratch each time.

Create a mouth that automatically animates according to your voice recording.
Join our newsletter for updates on this book and more great stuff we create!