Programming a Highlight Tool
In this course you will create an Automation Blocks tool that adds one of the following highlight shapes around each layer that you currently have selected.

You will learn
- how to create shape layers
- how to apply presets
- how to loop over selected layers
- how to set properties like the scale or position of a layer
- how to measure the bounding box (source rect) of a layer
Using the Highlight Tools
Just Give Me These Tools!
If you just want to use the highlight tools and don't want to learn how they are created, you can download them from our Community Library in the folder Rigs and Presets/Shapes/Burst and Highlight Shapes.
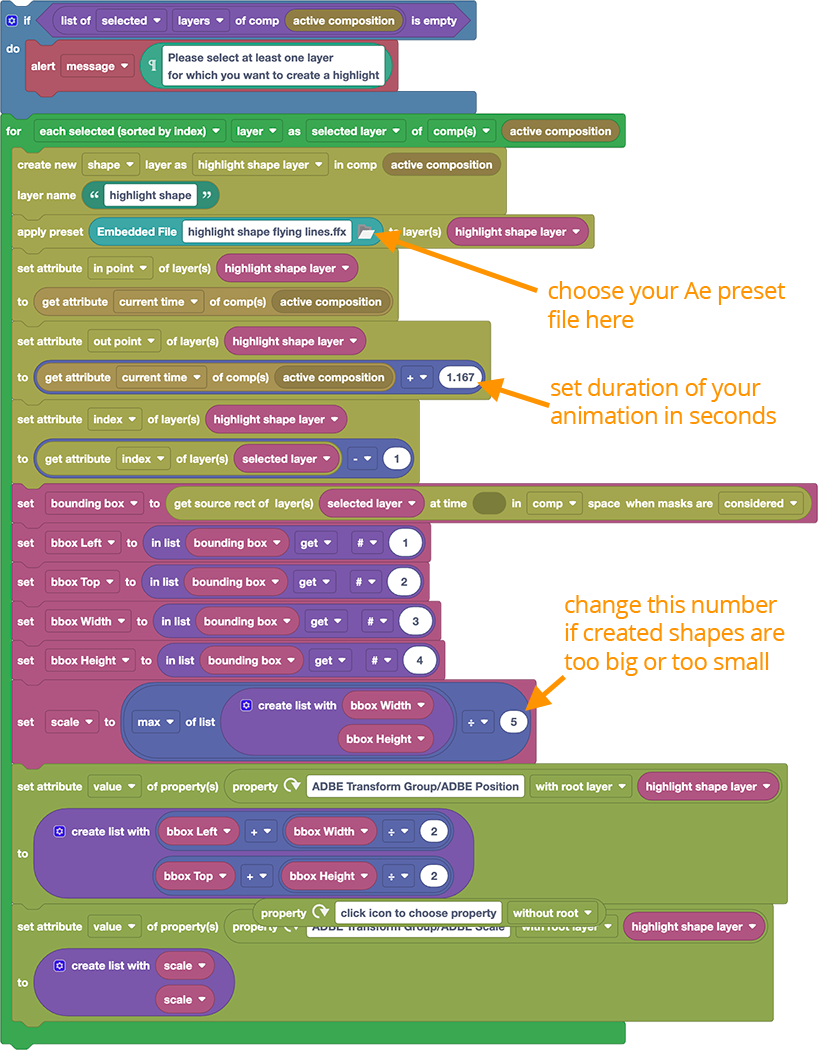
Fast Track: Create Your Own Highlight Tool
To create your own variant of the highlight tool with a custom design, there is no need to fully understand the code. Just start with one of the existing highlight shapes, change the shape layer however you want, and save its contents & effects in a new animation preset. To create a new tool based on your new preset, you just need to customize three small parts in the code:
If you want to fully undestand the code from start to finish, watch the following classes:
Class 1: Creating a Shape Layer and Applying a Preset
In this class, you'll learn how to create a new shape layer and apply a preset to it. This is the easiest way to create any custom shapes - you can also add effects, keyframes, and even expressions using this approach in no time.
Class 2: Customizing the Preset for Each Selected Layer
In this class we extend our tool so that instead of creating a single shape layer, it creates a separate one for each currently selected layer. We measure the size and location of all these selected layers so we can adust the position and scale of the hightlight shapes we create accordingly.