Rendering Tools
Render Clips Of Sequence
This tool is useful, if you need to export each single clip of your sequence separately.
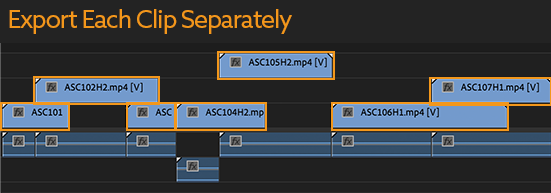
The tool loops over each clip of the active seuqence and adds each of them to the render queue with the in- and out-point set exactly to the range used in the sequence. Note that the tool adds the clips themselves to the render queue, not the respective section of the sequence. This means you obtain a clean render of each individual clip without overlapping content from other tracks and without any effects you may have applied in the sequence.
Output Folder
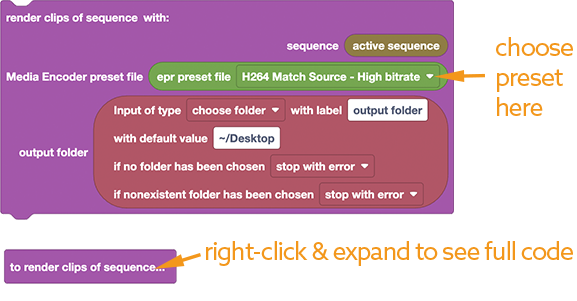
In the Inputs panel of Automation Blocks the tool shows an input named "output folder" where you can choose where the rendered files should go. Of course, you can change the output folder also in Adobe Media Encoder, before you start rendering.
Custom Media Encoder Preset
After the clips have been added to Adobe Media Encoder, you can select them all in the render queue and customize the render preset. However, if you tend to always use the same render preset, you can also customize the default render preset in the block code.
Custom Naming
By default, the name of the rendered clips is composed out of
- the name of the sequence
- followed by the number of the clip (simply counting all clips of the sequence starting from one)
- followed by the name of the clip (as shown in the project panel)
If your sequence is named "my project", for example, and the second clip used in the sequence is named "ASC102H2", then it will be added to the render queue with the name "my project_clip_2_ASC102H2". The clip numbers ensure that even if a clip is used multiple times in the sequence each of them obtains a unique filename.
The file names are created near the very end of the block code. If you want to change the naming, you can customize this part of the code:
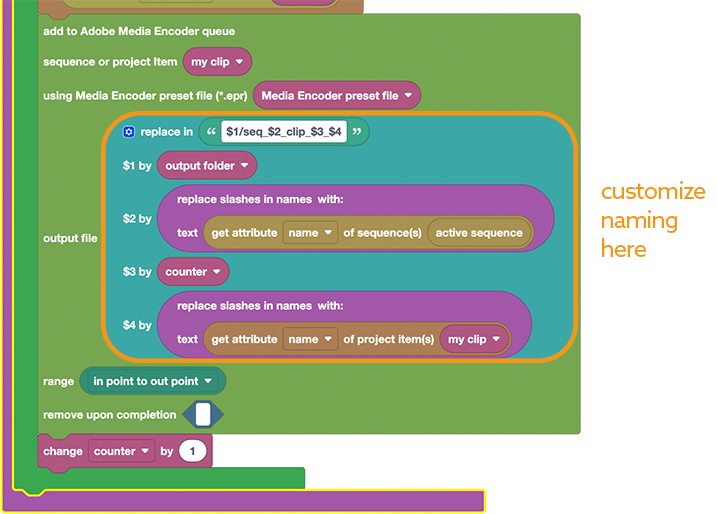
The purple "replace slashes in names" blocks ensure that slashes are removed from the names of the sequence and the project items, since slashes are not allowed in filenames.
Render Frames at Markers
Streamline your still image rendering process in Adobe Premiere Pro! Say goodbye to manually exporting each frame and hello to an efficient workflow that saves you valuable time. Learn how to set sequence markers at desired frames, and then utilize Automation Blocks to automatically render images at all those markers.
In the tutorial we also explain how to customize the block code of the tool to add more fancy naming options.
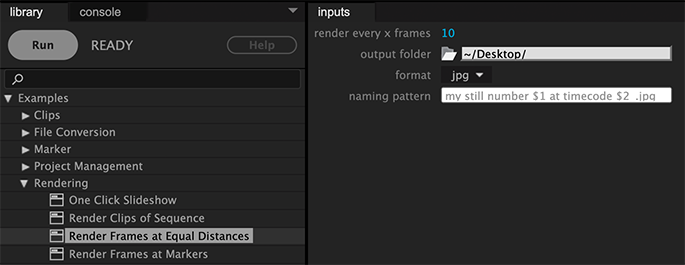
Render Frames at Equal Distances
Say, you need to export one image of your sequence every 10 frames, then this tool is for you. Just choose in the inputs panel how many frames should be between the exported frames as well as the format (jpg, png or tiff) and run the tool:
Based on this forum discussion I recorded the following video showing how to customize the tool:
In the video we implement the following changes:- the name of the sequence is used for the naming of the output files
- instead of the active sequence all sequences selected in the project panel are processed
- extra parameters are added to the UI to specify a start and end timecode for the range that should be processed
Custom Naming
As naming pattern for the file names of the exported images you can enter a text which may contain the following placefolders:
- $1 will be replaced by the number of the image (like a basic image counter starting with 1)
- $2 is the timecode of the image in the timecode format currently chosen for the sequence