AI Setup Roles
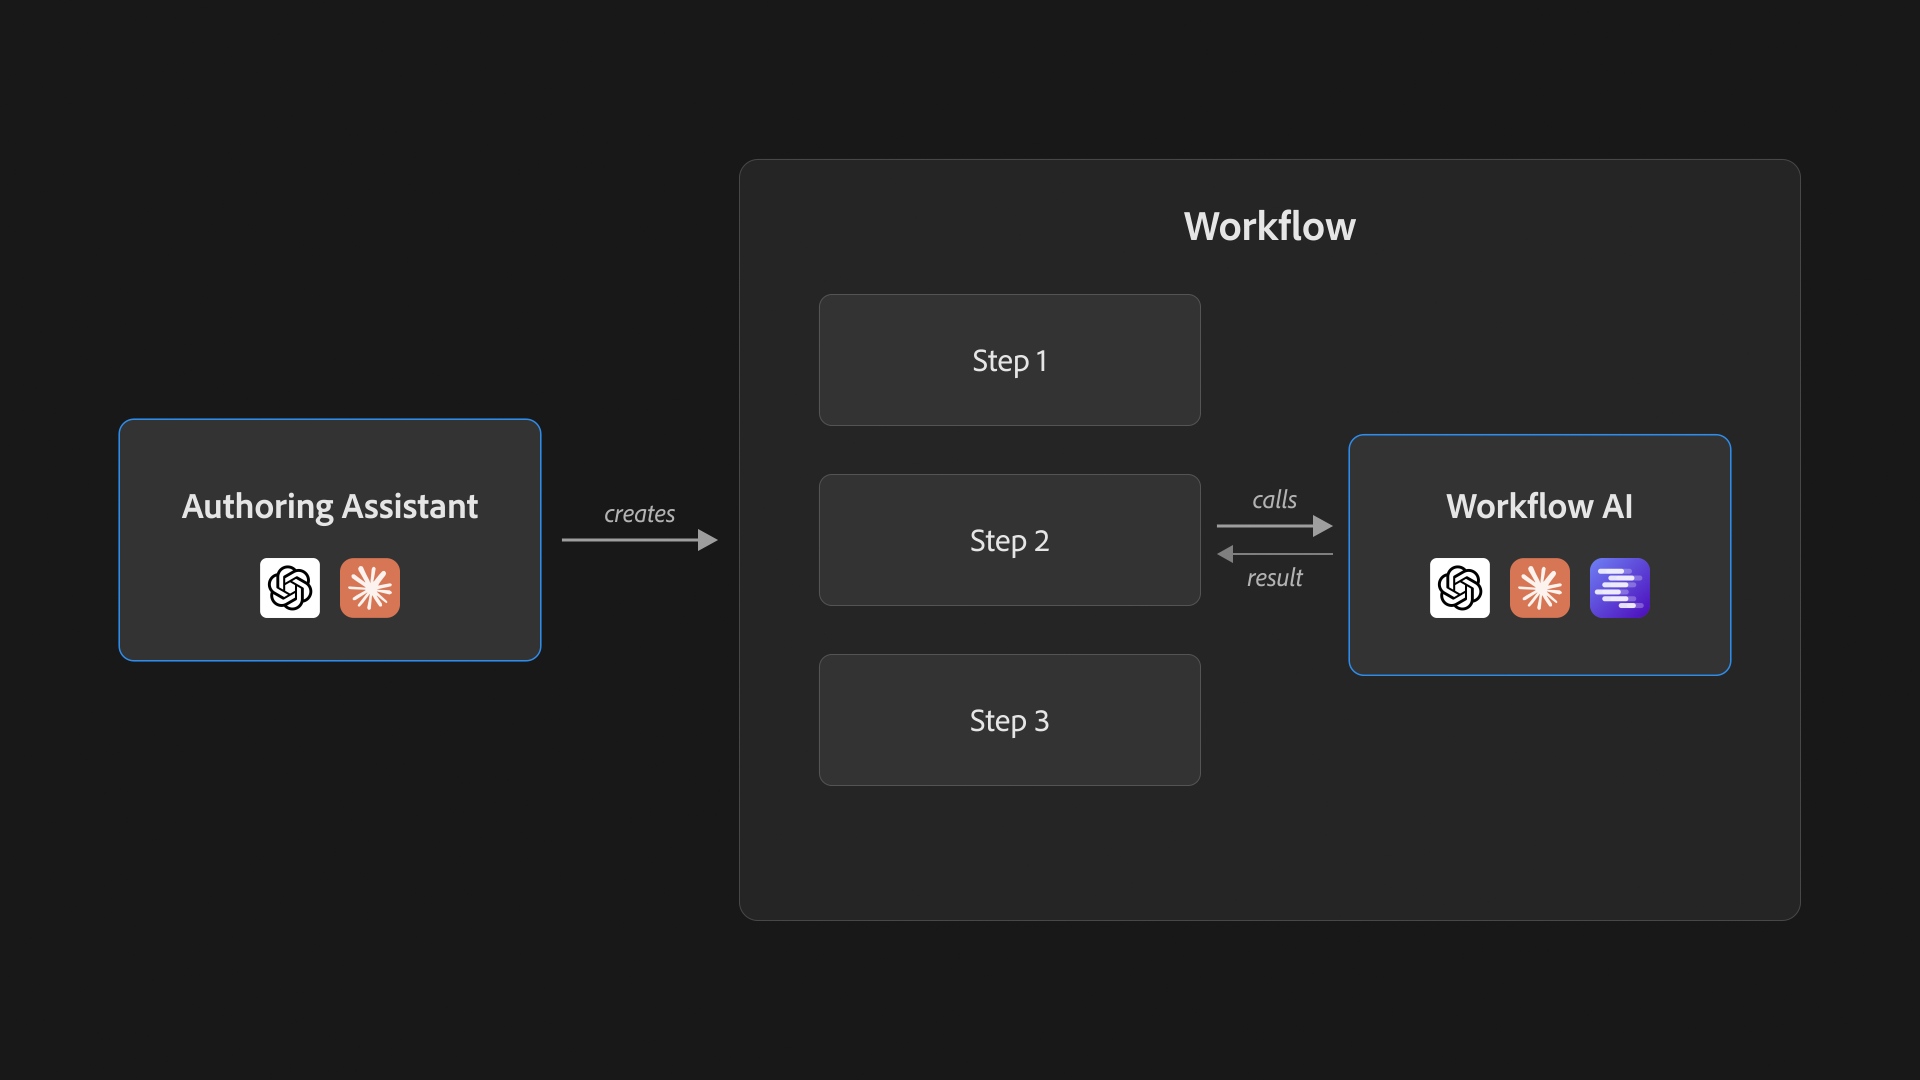
Automation Agent can use AI in two different places. They sound similar at first, but they are different jobs.
- Assistant: the AI you talk to while you build, test, and run automations with Premiere open.
- Workflow AI: the model a saved workflow can call later while that workflow is running.
The Assistant designs the reusable workflow during authoring. Once you have reviewed and saved it, later runs execute that same workflow without asking the Assistant to design it again. You only return to the Assistant when you want to change or extend the script. If the script includes Workflow AI steps, those steps call the configured provider during each run; scripts without them need no AI during execution.
Most users should start with Guided Setup in the panel's AI Setup tab. It asks which AI tools or subscriptions you have, checks what is already installed where it can, and guides you through the matching setup steps. See Set Up Your AI.
If you want to see useful workflows before setup, the Quick Start begins in the Library and returns to AI Setup immediately afterward for the full experience.
The normal AI Setup screens remain available for manual edits and advanced configuration after that.
Assistant
The Assistant is the AI you interact with directly.
Use it when you want to say something like:
Inspect this Premiere project and create chapter marker suggestions for the active sequence.
The Assistant can use Automation Agent through MCP to inspect the project, run read-only probes, validate Runtime DSL, ask before risky changes, and execute permission-scoped actions.
Good Assistant choices are usually strong agent products such as:
- the Codex surface in the ChatGPT desktop app
- Claude Code
- Claude Desktop Code tab
- Claude tab in Claude Desktop
For Assistant setup, the important pieces are:
- the Automation Agent MCP server connection
- an MCP entry in the Assistant tool
- the Automation Agent skill, guidance layer, or prompt preset where that tool supports one
Workflow AI
Workflow AI is different. It is not the chat window you are talking to.
It is the model a saved Automation Agent workflow can call from inside the workflow — and it is what makes saved workflows more than fixed macros. The workflow keeps all the repeatable steps frozen and reviewable, and hands only the steps that genuinely need judgment to the AI. That keeps repeated runs fast, cheap in tokens, and reproducible.
For example, a saved transcript workflow might:
- find the selected Premiere project items
- read their transcripts
- split long transcripts into smaller chunks
- call Workflow AI to proofread each chunk
- check the returned text
- write the result back or save it for review
In that workflow, Workflow AI only does the proofreading step. The saved workflow already knows how to collect the transcript and where to put the result. The transcript proofreading and translation workflows that ship in The Script Library are built exactly this way.
Good Workflow AI choices include:
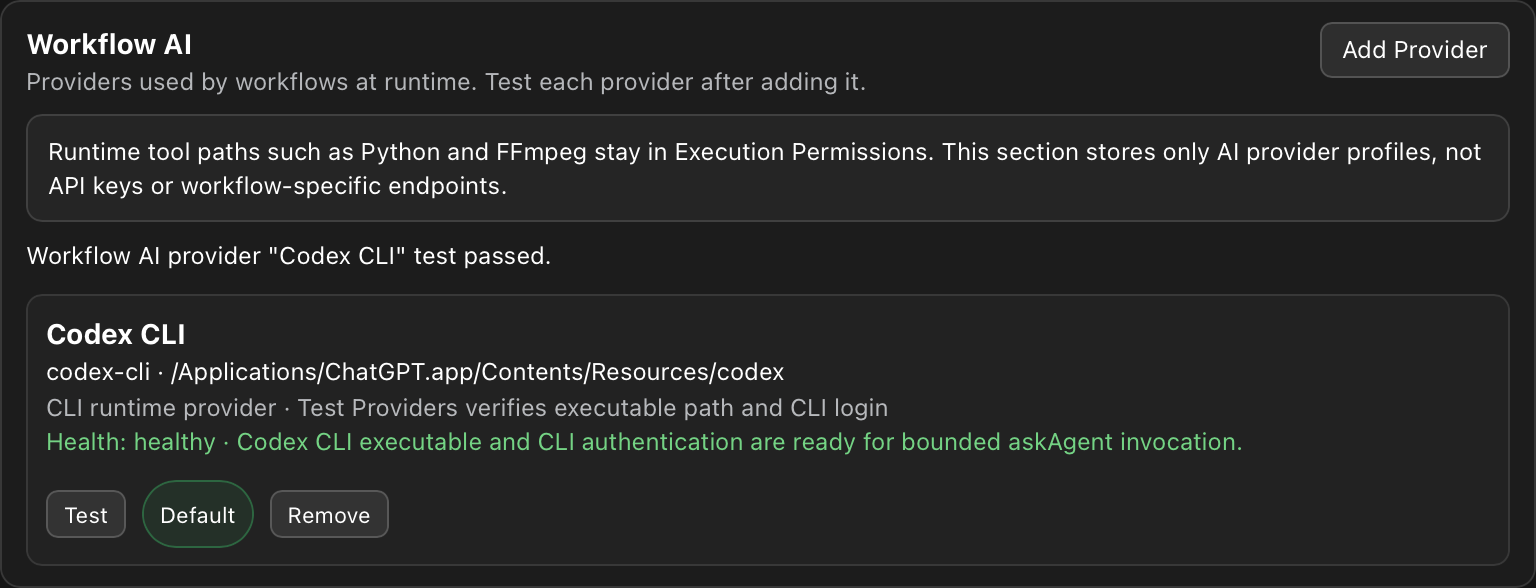
- Codex CLI
- Claude Code CLI
- LM Studio for local or offline model runs
You only need one tested Workflow AI provider for the usual AI-powered workflows. Configure additional providers when a particular workflow or operating environment calls for them; you do not need to install all three.
For Workflow AI setup, the important pieces are:
- the provider executable or local server
- login or local server readiness
- a saved provider profile in AI Setup
- a successful provider test
- model selection for local providers such as LM Studio
One Tool Can Cover More Than One Role
Some tools can serve both roles.
Codex is a common example. You may use the Codex surface in the ChatGPT desktop app as the Assistant, and configure the Codex CLI as your only Workflow AI provider so saved workflows can call Codex later. These are separate roles even when one installation provides access to both.
Claude is similar, but the naming is easy to confuse:
- Claude Desktop Code tab or Claude Code can be used for Assistant work.
- Claude Code CLI is the command-line provider used for Workflow AI.
- Claude tab in Claude Desktop uses a local stdio adapter to the same HTTP helper and is not a Workflow AI provider.
LM Studio is usually the opposite. It is useful as local Workflow AI, but it is usually not the best Assistant for creating complex Premiere workflows from scratch.
Multiple Workflow AI Providers Are Normal
You do not have to choose exactly one provider forever.
You might configure:
- Codex CLI for demanding workflows
- Claude Code CLI for Claude-based runs
- LM Studio for workflows that must run locally or offline
Saved workflows can ask for a provider family or use your local default. The machine running the workflow resolves that to one of the configured provider profiles.
Recommended Starting Point
If you are setting up Automation Agent for the first time:
- Open the Automation Agent panel.
- Go to
AI Setup. - Click Start Guided Setup.
- Select the AI access you have: OpenAI / ChatGPT, Anthropic / Claude, or Local / offline.
- Follow the steps for each tool.
After that, use the normal AI Setup sections only when you want to inspect or change the details manually. The full walkthrough is on Set Up Your AI.
Related Pages
- Quick Start
- Set Up Your AI
- OpenAI Codex Setup
- Claude Code Setup
- Claude Desktop Setup
- LM Studio Setup
- Developing Offline Workflows Online
After updating Automation Agent
The panel checks locally installed Codex and Claude Code skills when it opens. A reminder appears only when the complete installed content matches a known older skill package. Later hides that reminder across panel restarts; the AI Setup badge and update action remain available. Missing, unreadable, modified, or unknown installations do not produce automatic update notifications.
Back up and update saves the existing folder outside the agent's active skills folder before replacing it. The result shows the backup location. Start a new agent conversation or restart the agent after updating. Manual installation and replacement remain available in each agent's setup section.
MCPBs and Claude Desktop skill uploads are not part of automatic update notifications. Install the current exports through Claude's own interface when needed. The panel cannot inspect uploaded skills; any manual upload confirmation in the Claude Desktop setup section is only your own attestation. An incompatible MCPB connection still reports an actionable error when used.